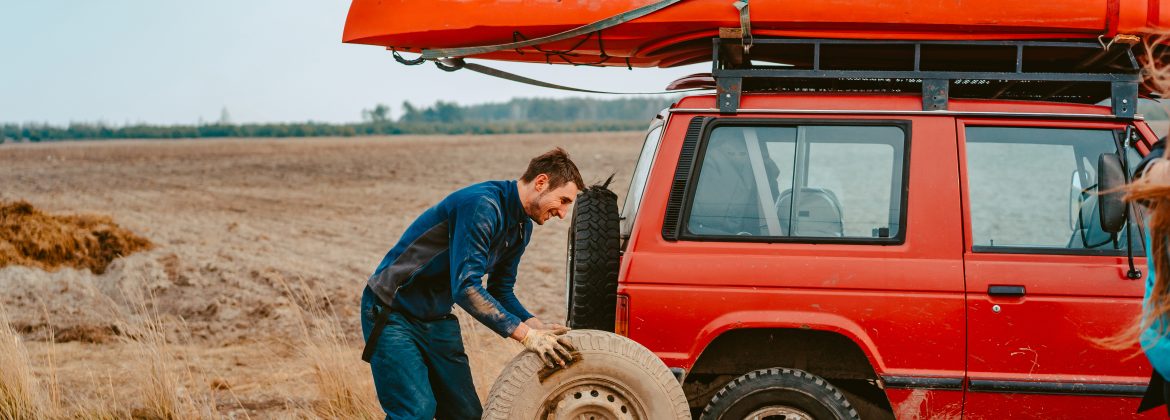
Overlanding Accessories Hayward drivers rely on can completely transform the safety, comfort, and performance of summer off-road adventures across Northern California. From auxiliary lighting and dual battery systems to winches, GPS tracking, dashcams, and suspension upgrades, the right overlanding setup helps Hayward drivers prepare for everything from Sierra Nevada forest roads to challenging backcountry trails near Carnegie SVRA and Lake Tahoe.
A lot of overlanding content covers the same short list of gear: lift kit, bigger tires, roof rack, winch, done. That is a reasonable starting point. But it skips the half of the build that actually determines whether a trip is comfortable, safe, and enjoyable from departure to return. Communication systems, electrical infrastructure, vehicle security, trail visibility technology, and in-cab audio setups all matter enormously once you are hours from pavement and cell service.
At Audiomobile in Hayward, our team has been building overlanding rigs, installing electrical systems, and outfitting vehicles for off-road use since 1975. This guide covers the full picture of what a well-prepared summer overlanding build looks like for Bay Area drivers, including the upgrades that most competitor guides skip entirely.
Want more ideas before planning your next adventure build? Explore our guide on 15 Practical Car Overlanding Accessories to Make Your Car an All-Around Better Experience in Hayward.
Start Here: Why Your Stock Vehicle Is Not Trail-Ready
Most trucks and SUVs sold in the United States are marketed with off-road language but are not genuinely prepared for sustained trail use in their stock configuration. Factory all-season tires, minimal ground clearance, a single battery, limited lighting, no recovery gear, and factory audio systems were not designed with a week in the Sierra in mind.
The gap between a factory 4×4 and a genuinely trail-capable rig shows up quickly in real conditions. Stock tires lose traction in loose dirt and gravel. Factory suspensions bottom out on rutted trails with added gear weight. A single battery drains fast when you run a fridge, lights, and charging devices overnight. Factory headlights leave large dark zones on unlit forest roads. These are not obscure edge cases. There are problems that every driver encounters on their first serious trip.
The good news is that none of this requires buying a new vehicle or spending a fortune. A focused, prioritized set of upgrades applied in the right order transforms any capable base vehicle into a reliable adventure rig. The guide below walks through each major category in the order that most Hayward drivers should approach their build.
New to overlanding upgrades? Our detailed guide on the importance of quality overlanding accessories for your car explains why choosing the right accessories matters for long-term reliability and trail performance.
Auxiliary and LED Lighting: The Upgrade That Changes Night Driving Completely
Auxiliary lighting is the single most impactful electronic upgrade for off-road vehicles. When you are navigating an unlit trail at dusk, working your way back to camp after dark, or setting up at a remote site with no ambient light around you, the difference between factory headlights and a properly installed auxiliary setup is enormous.
Most off-road lighting upgrades fall into three categories: light bars, ditch lights or A-pillar lights, and rock lights. Each serves a different purpose, and the best builds combine at least two of them.
LED Light Bars
LED light bars mount to the roof, front bumper, or hood and throw a wide, powerful beam forward. They are the primary source of long-range illumination on dark trails. Quality bars from brands like Rigid Industries and Baja Designs provide far greater range and brightness than factory headlights, and they are built to handle dust, rain, vibration, and the general punishment of off-road use.
Ditch Lights and A-Pillar Lights
Ditch lights and A-pillar lights fill in the wide-angle illumination that a forward-facing light bar cannot cover. When you are navigating a tight switchback or a section of trail with sharp turns, your light bar is pointing straight ahead while the actual path curves to the side. Ditch lights solve this problem by covering the near-field sides and corners.
Rock Lights
Rock lights mount underneath the vehicle and illuminate the ground directly around the tires. They are invaluable for crawling over obstacles at slow speed, and they serve as camp lighting once you are set up for the night.
Why Professional Installation Matters for Lighting
Proper auxiliary lighting installation is not just about mounting the hardware. Clean wiring, correct switch placement in the cab, proper fuse protection, and the right relay setup all determine whether your lighting system performs reliably and does not create electrical issues over time. Incorrect wiring on high-draw circuits can cause flickering, relay failure, or in serious cases, fire risk.
Looking for a comprehensive overview before booking? Read our overlanding lighting setup guide covering what your adventure vehicle needs. You should also review how to avoid common overlanding lighting installation mistakes to understand what separates a clean professional build from a problem-prone DIY attempt.
For those considering headlight upgrades alongside auxiliary lighting, we cover LED headlight upgrade rules in California including legal lumens and beam patterns. For a broader view of how lighting improves overall vehicle safety, explore how LED light installation services enhance vehicle visibility and safety.
Interested in improving nighttime trail visibility even further? Read Adaptive Lighting Systems Explained: How Modern Tech Makes Night Driving Safer in Hayward.
Tire Pressure Management for Off-Road Trails
One of the most overlooked parts of off-road preparation is tire pressure management. Many new overlanders focus heavily on visible upgrades like roof racks and lighting while ignoring the massive performance difference that proper tire pressure makes on dirt, sand, gravel, and rocky terrain.
Why Airing Down Matters
Airing down tires increases the contact patch between the tire and the ground, improving traction and ride comfort on uneven surfaces. Lower pressure allows tires to flex more effectively over rocks and loose terrain while reducing harsh impacts transferred into the suspension. The difference between 35 PSI on a paved road and 18 PSI on a rocky Sierra Nevada trail is night and day for both control and comfort.
Compressors and Deflator Kits
Portable air compressors and tire deflator kits have become essential tools for Northern California trail driving. Drivers often air down before entering trails around the Sierra Nevada or Diablo Range and then air back up before returning to pavement. A quality portable compressor like the ARB Twin or a ViAir unit handles tire inflation quickly and reliably. A precision deflator kit removes the guesswork from hitting your target PSI when airing down.
Choosing the Right PSI for Your Rig
The right air-down PSI depends on terrain type, tire size, vehicle weight, and load distribution. Heavy overlanding builds carrying rooftop tents, recovery gear, refrigerators, and water storage place different demands on tires than lightly equipped weekend rigs. As a general starting point, most trucks and SUVs air down to 18 to 22 PSI for dirt and gravel roads and as low as 12 to 15 PSI for soft sand. Always consult your tire manufacturer’s minimum sidewall pressure rating before going below that threshold.
Looking to improve your overall trail performance? Read our guide on six off-road accessories to enhance your vehicle performance to discover practical upgrades that work alongside proper tire management for serious off-road adventures in Hayward.
Dual Battery Systems: The Foundation of Off-Grid Electrical Power
This is the upgrade that most overlanding guides either skip or bury at the bottom of a long list. A dual battery system is not optional for any serious off-road or camping use. It is the foundation on which everything else in your electrical build depends.
The Core Problem with a Single Battery
Your vehicle’s starting battery is designed to deliver a large burst of power to start the engine and then be immediately recharged by the alternator. It is not designed to supply sustained low-level power for hours. When you run a portable fridge, LED camp lighting, phone charging, a dashcam, and auxiliary lights overnight without the engine running, you are discharging a battery that was never built for that kind of use. The result is a drained starting battery in the morning and a vehicle that will not start at a remote trailhead.
How a Dual Battery System Works
A dual battery system separates your starting battery from your house battery. Your starting battery stays dedicated to the engine. Your house battery handles all accessories and auxiliary loads. An intelligent battery isolator or DC-to-DC charger manages the charging relationship between the two, keeping the house battery topped up while driving without putting excessive load on the starting battery.
AGM vs Lithium House Batteries
For most East Bay overlanders running a fridge, lights, and basic electronics, a quality AGM house battery paired with a proper isolator and DC-to-DC charger is sufficient for two to three days of camping without engine time. Lithium iron phosphate (LiFePO₄) batteries offer significantly more usable capacity at a lighter weight and handle deep discharge cycles far better than AGM. They cost more upfront but deliver better long-term performance for drivers who camp regularly.
Solar Integration
For longer trips or heavier loads, adding a solar panel to the system helps maintain the house battery even on rest days. Roof-mounted fixed panels or portable folding solar kits both work effectively. A properly sized solar setup paired with a dual battery system creates a fully self-sufficient electrical platform for extended backcountry trips in the Sierra Nevada or Diablo Range.
Learn how stronger wiring and charging infrastructure improve off-road reliability in our guide on the Big 3 wiring upgrade and high output alternator installation in Hayward. For diagnosing any existing electrical issues before you build, read about what to expect during an electrical diagnostic check at Audiomobile Hayward.
Portable Power Stations and Solar Charging for Extended Trips
As overlanding trips become longer and more remote, portable power stations and solar charging systems are becoming increasingly popular among Bay Area adventure drivers. These complement a dual battery system rather than replacing it, adding a separate power reserve for non-vehicle electronics.
What Portable Power Stations Cover
Portable power stations allow drivers to run laptops, drones, camp lighting, refrigerators, camera equipment, and communication devices without heavily relying on the vehicle’s battery system. Units from brands like Goal Zero, EcoFlow, and Jackery deliver between 500Wh and 2000Wh of capacity, making them capable of running a camping setup for a full weekend without recharging.
Solar as an Off-Grid Charger
Solar charging systems extend off-grid capability significantly. Roof-mounted solar panels or portable folding solar kits can keep auxiliary batteries topped off during multi-day stays at remote campsites. For drivers exploring remote Sierra Nevada trails or extended Tahoe trips, integrating solar charging with a dual battery system creates a far more reliable and sustainable electrical setup than a single battery or a portable station alone.
Want to strengthen your vehicle’s electrical foundation before adding power accessories? Explore our detailed guide on the Big 3 wiring upgrade and high output alternator in Hayward to understand why electrical infrastructure is the right starting point for any serious overlanding build.
Winch and Recovery Gear: What to Install Before You Need It
No overlanding vehicle is completely immune to getting stuck. Soft sand, deep mud, soft soil on a hillside, a mistake in a water crossing, and a mechanical failure on a remote trail: recovery situations happen to experienced drivers in properly equipped vehicles. The question is whether you have the tools to get out independently or whether you are waiting for someone to find you.
Choosing the Right Winch
A winch is the most capable recovery tool you can add to your vehicle. Mounted to the front bumper, a quality electric winch allows you to anchor to a tree, rock, or another vehicle and pull yourself out of situations that no amount of wheel spinning will resolve. For solo overlanding, it is close to mandatory. For group trips, the group vehicle with the winch becomes the one that handles recoveries for everyone.
The general guidance is to choose a winch rated for at least 1.5 times your vehicle’s gross vehicle weight rating. For a loaded full-size truck, that typically means a 12,000 to 16,500-pound rated winch. Synthetic rope is strongly preferred over wire cable: it is lighter, safer to handle under tension, floats in water crossings, and does not store the dangerous recoil energy that a snapped wire cable releases.
Complete Recovery Kit Components
Recovery boards, shackles, snatch blocks, and tree saver straps complete a capable recovery setup. Recovery boards (traction boards) allow you to bridge soft surfaces for your tires in sand or mud. A snatch block doubles your winch’s pulling capacity and changes the pull angle when a straight-line pull is not possible. Tree saver straps protect anchor points and are mandatory when using a tree as your recovery anchor.
Winch Electrical Integration
Our team installs winches and handles the full wiring integration that most DIY installations overlook. A winch draws enormous current at full load, sometimes exceeding 400 amps, which is why the connection to the battery, the fuse protection, and the circuit integrity matter as much as the winch unit itself.
Choosing the right recovery equipment matters. Explore our detailed guide on how to pick the perfect off-road winch for unstoppable adventures in Hayward before selecting your setup. For a complete installation context, read winch and light bar installation in Hayward: must-have upgrades for off-road adventures.
GPS Navigation and Communication: The Overlooked Safety Essentials
This is the category that most overlanding gear lists mention briefly and then move past. It deserves far more attention. Communication failure in a remote area is not an inconvenience. It is a safety emergency.
Cell service vanishes quickly once you leave paved roads in Northern California. The hills around Carnegie SVRA drop the signal almost immediately. The Diablo Range backcountry is a dead zone. Sierra Nevada trails lose service within the first mile of the forest road. If something goes wrong on these routes, you need communication options that do not depend on your phone.
GMRS Radios
GMRS radios have become the dominant choice for off-road group communication in 2025 and 2026. A GMRS license costs $35 for 10 years and covers your entire household. Radios like the Midland MXT575 deliver significantly better range than CB, can access repeater networks in many parts of Northern California, and are a practical, affordable upgrade for any overlanding group. At around $300 for a quality unit with a quality antenna, this is one of the highest-value safety upgrades you can add to any rig.
Ham Radio for Serious Overlanders
Ham radio offers the most capable communication option for serious overlanders. With access to the national repeater network, a properly licensed ham radio operator can reach help from terrain where every other option has failed. The technician license exam is straightforward and can be completed in a weekend of study. Our team installs ham and CB radio systems for overland vehicles with clean in-cab wiring, properly mounted antennas, and correct grounding for optimal performance.
Satellite Messengers
Satellite messengers like the Garmin inReach Mini 2 provide two-way text messaging and SOS capability from anywhere on Earth with a view of the sky. For solo overlanders or trips into genuinely remote terrain, a satellite communicator is the safety net that makes everything else less stressful. These devices operate independently of cell coverage and connect directly to the Iridium satellite network.
Dedicated GPS Navigation
Dedicated GPS navigation units with preloaded topographic maps remove your dependence on phone-based navigation. Apps like Gaia GPS and onX Offroad can be downloaded for offline use, but a dedicated unit with a bright, glare-resistant screen outperforms a phone on the dashboard in direct California sun. Pairing GPS navigation with vehicle GPS tracking for security in California gives you both trail navigation and theft protection in a single build. You can also review the five key benefits of GPS tracking for cars for a broader view of how tracking technology protects your investment.
Vehicle Security While Overlanding: What Most Guides Completely Miss
Here is a gap that almost no overlanding gear guides address: your vehicle’s security situation changes completely when you are overlanding. You are leaving a truck or SUV, often loaded with thousands of dollars of gear, parked at a trailhead or remote campsite with no surveillance, no alarm response, and no neighbors to notice anything unusual.
Bay Area trailhead theft is a well-documented problem. Carnegie SVRA, Mount Diablo State Park, and even Tahoe-area trailheads see vehicle break-ins and, increasingly, entire vehicle thefts targeting keyless push-to-start trucks. The same overlanding rigs that make great adventure vehicles are high-value targets.
Alarm Systems and Immobilizers
A properly installed vehicle security system addresses trailhead theft in multiple ways. An alarm with interior and perimeter sensing deters opportunistic break-ins. A GPS tracking system gives you real-time location data if the vehicle is moved without authorization. A kill switch or immobilizer prevents a thief from starting the engine even with a relay attack on your key fob.
Compustar systems with Secure Start technology specifically address the relay attack vulnerability that makes modern push-to-start trucks so easy to steal. Our team has covered this in depth in why push-to-start theft is rising in Hayward and how kill switches and Compustar Secure Start protect your vehicle. For a full comparison of security system options, see the guide on the best car alarm system with kill switch in 2026 for Hayward drivers.
GPS Tracking for Trailhead Protection
GPS tracking installed in your overlanding rig allows you to monitor your vehicle’s real-time location from your phone, even from the trail. If the vehicle is moved while you are hiking or sleeping at camp, you will know immediately and can alert authorities with precise location data. Read our guide on how to prevent car theft in the Bay Area with the best security systems for a detailed overview of layered security strategies.
For a complete picture of how overlanding accessories and anti-theft systems work together, read how overlanding accessories and anti-theft systems can work together for ultimate vehicle protection.
Dashcams with Parking Mode
A dashcam with parking mode records any motion or impact while the vehicle is parked and unattended. At a trailhead, this captures footage of anyone approaching or touching the vehicle. For a detailed comparison of dashcam approaches for parked vehicle protection, the breakdown of dashcam parking mode versus standard dashcam operation explains exactly how this works. Our guide on how dashcams and smart video evidence can lower your car insurance premium also shows the financial benefits that go alongside the security benefits.
Roof Racks, Cargo Management, and Storage Systems
Roof racks are one of the first visible upgrades drivers add to an overlanding vehicle, but the full value of good cargo management goes well beyond putting a rooftop tent on top.
What a Roof Rack Unlocks
A quality roof rack on a truck or SUV opens up the entire roof as usable cargo space. Recovery boards can be mounted flat on the rack, out of the way but accessible when needed. Jerry cans of fuel or water ride up top, where they are secure and do not consume cab or bed space. A rooftop tent folds flat on the rack when driving and opens into a sleeping platform that is off the ground, away from insects and ground moisture, and much faster to set up than any conventional tent.
Weight Distribution and Suspension
Weight distribution matters enormously with a loaded roof rack. Every pound on the roof raises the center of gravity and affects handling. A roof rack loaded with a tent, two recovery boards, and a spare tire can add 200 to 300 pounds at the highest point of the vehicle. This makes quality suspension and shock upgrades even more important once the rack is loaded.
Bed Racks and Interior Storage
Bed management for truck owners follows a similar logic. Bed racks allow you to build vertical storage above the truck bed, keeping the bed floor available for gear. Drawers and storage systems organize the bed efficiently for multi-day trips where access to specific items need to be fast and easy. Modular systems from brands like ARB and Decked are popular among East Bay overlanders for their combination of organization and load capacity.
Explore more practical gear recommendations in our guide on 15 practical overlanding accessories for a better adventure experience in Hayward and review how to choose the best overlanding accessories for your vehicle to prioritize based on your specific use case.
Suspension Upgrades for Better Ride Quality and Load Handling
Suspension upgrades are one of the most important investments for overlanding drivers carrying additional gear weight. Factory suspension systems are designed for normal driving conditions, not for vehicles carrying rooftop tents, recovery equipment, camping supplies, refrigerators, and auxiliary batteries.
What Upgraded Suspension Delivers
Quality shocks, upgraded springs, and lift kits improve ride comfort, handling, articulation, and ground clearance while helping maintain stability with heavier loads. A properly tuned overlanding suspension balances trail capability with on-road comfort, since most builds need to perform on both California highways and backcountry roads.
Lift Kits and Ground Clearance
A lift kit improves ground clearance and allows larger tires, which matters significantly for technical terrain. Drivers focused on Carnegie SVRA and Diablo Range fire roads can get meaningful improvement from a 2-inch leveling kit paired with all-terrain tires. Drivers targeting the Rubicon Trail or Sierra Nevada technical routes need a more comprehensive 3 to 4-inch suspension lift with upgraded shocks to match.
Load-Rated Springs and Progressive Rate Shocks
When your vehicle is carrying 400 to 600 pounds of additional gear, factory springs compress more than designed, reducing ground clearance and causing the vehicle to wallow through corners. Load-rated replacement springs maintain proper ride height under the weight of your build. Progressive rate shocks provide a comfortable, controlled ride across the wide range of speeds and surface types an overlanding vehicle encounters.
Planning a complete off-road setup? Our article on how to choose the best overlanding accessories for your vehicle helps Hayward drivers prioritize the right upgrades. For a comprehensive reference on parts and performance upgrades, review the performance parts buyer’s guide for Hayward drivers.
In-Cab Audio Upgrades: Comfort for Long Drives and Remote Camps
Long drives to reach Northern California trails involve hours of highway driving before the adventure even begins. Spending four hours on I-580 toward the Sierra Nevada in a truck with a failing factory head unit and blown factory speakers is genuinely unpleasant when a proper audio setup makes the same drive comfortable and engaging.
Aftermarket Head Units and Smart Connectivity
A modern aftermarket head unit with Apple CarPlay or Android Auto integration does more than improve sound quality. It gives you a large, easy-to-read navigation screen that works with offline maps. It provides USB and wireless charging for devices. It integrates with your backup camera if you have one installed. And it replaces a factory unit that was likely designed to a budget spec that favors cost over performance.
Explore your options through the Apple CarPlay installation Hayward complete guide to smart connectivity upgrades, and the guide on upgrading older cars with Apple CarPlay and smart infotainment systems in Hayward. For a direct comparison of smart connectivity platforms, read Apple CarPlay vs Android Auto for Bay Area drivers explained.
Speaker Upgrades and Amplifiers
Speaker quality in most factory truck and SUV installations is mediocre. Factory speakers are selected to meet a price point, not to perform at volume with bass extension over road noise. An aftermarket speaker upgrade at the front doors, combined with a quality head unit, transforms the in-cab experience. For trucks and SUVs that spend time at basecamp, a subwoofer and amplifier add the kind of low-frequency presence that makes camp music satisfying rather than thin and distant.
DSP Tuning for Trail Vehicles
Digital signal processor tuning ensures your audio system sounds correct across the wide range of environments an overlanding vehicle encounters, from freeway noise to a silent trailhead. Road noise, wind noise at speed, and acoustic differences between trail surfaces all affect how your audio system sounds. DSP tuning compensates for these variables and delivers consistent, enjoyable audio regardless of conditions. Read about how DSP tuning transforms your daily commute and driving experience to understand what a properly tuned system delivers.
For the complete picture on in-vehicle audio upgrades, explore the complete guide to car stereo installation and audio infotainment upgrades in Hayward and the guide on audio upgrades for older cars and what to know before replacing your radio in Hayward. If a large touchscreen is part of your build, the ultimate guide to big touchscreen car stereo installation in Hayward covers everything you need to know.
Backup Cameras and Dashcams: Electronics That Actually Save You on the Trail
These are two of the most underrated overlanding electronics, and they serve very different but equally important purposes on and off the trail.
Backup Cameras for Trail Use
A backup camera system is not just for parking lots. On the trail, reversing a truck or SUV over uneven terrain with a full load is one of the most technically demanding things you will do. You are trying to judge distance to rocks, tree stumps, drop-offs, and other vehicles while your normal rear view is completely obscured by your load and the vehicle’s blind zone.
Multi-camera setups go further. Side-view cameras eliminate the blind zones along the rocker panels and doors, which are where rocks and stumps damage vehicles during low-speed crawling. A forward-facing camera lets you see exactly where your front bumper is relative to an obstacle. For serious trail use, comprehensive camera coverage removes the guesswork from every tight section. Our guide on why every driver needs backup camera reverse safety technology covers the safety case in detail.
To understand which dashcam display format works best for your vehicle, read the comparison of rearview mirror dashcams versus standard dashcams.
Dashcams for Trail Documentation and Security
A dashcam documents the trail itself. Recovery footage, scenic drives, and evidence of any trail incidents are all captured automatically. A quality dashcam with parking mode provides trailhead security, as discussed in the vehicle security section. Our guide on why professional dashcam installation matters more than the camera itself explains why hardware quality only matters if the installation is done correctly.
For older trucks being prepared for their first serious trail season, the guide on retrofitting dashcams on older Bay Area vehicles walks through the full process. The complete guide to professional dashcam installation for safer driving in Hayward covers the installation process from start to finish for any vehicle type.
Aftermarket blind spot monitoring is another electronics upgrade worth considering for overlanding builds. Read the complete guide to aftermarket blind spot monitoring systems for older vehicles to see how radar, ultrasonic, and video-based detection compare.
Why Professional Electrical Installation Matters for Overlanding Builds
Modern overlanding builds involve increasingly complex electrical systems that require careful planning and professional integration. Incorrect fuse sizing, poor wire routing, improper grounding, or overloaded circuits can lead to electrical failures, intermittent faults, or, in serious cases, fire risk.
CAN Bus and Modern Vehicle Electrical Architecture
Modern vehicles use CAN bus communication systems that coordinate all electrical components through a shared data network. Adding aftermarket electronics without understanding how your vehicle’s CAN bus operates can cause unexpected behavior: false alarm triggers, module errors, or communication failures between electronic control units. A professional installer knows which circuits to tap and which to avoid.
The Cost of Getting It Wrong
A DIY electrical mistake on an overlanding vehicle is not just an inconvenience. It can mean a dead vehicle on a remote trail, a fire in your cab, or a failed security system that leaves your vehicle unprotected at a trailhead. The cost of a professional installation is modest compared to the cost of recovering or repairing a vehicle that has experienced electrical damage.
Before adding complex electronics to your rig, learn why professional integration matters in our guide: car professional installation importance for modern electronics and infotainment systems.
Building Your Overlanding Rig in Hayward: Where to Start
The most common mistake drivers make when starting an overlanding build is trying to do everything at once. They order a lift kit, a winch, lights, a rack, and a dual battery system simultaneously, and then realize they are either overwhelmed by the installation scope or find that some of their choices created conflicts with others.
A phased approach produces better results and better decisions. Here is how Audiomobile recommends approaching a summer-ready build for East Bay drivers:
Phase 1: Electrical Foundation
Dual battery systems, upgraded wiring, and charging infrastructure. This is the infrastructure that everything else depends on. Do not add accessories that draw significant power before this is in place.
Phase 2: Lighting
Auxiliary lighting, rock lights, and LED visibility upgrades. These are high-draw accessories that need the electrical foundation from Phase 1.
Phase 3: Security and Electronics
Alarm systems, GPS tracking, kill switches, dashcams, and backup cameras. These protect the vehicle and improve daily and trail usability simultaneously.
Phase 4: Recovery and Exterior
Winch, bumper, roof rack, and cargo management. These often require mechanical work alongside the electrical installation.
Phase 5: Audio and Communication
Head units, speakers, GMRS or ham radio installation, and DSP tuning. These complete the in-cab experience for long drives and remote trips.
Still planning your ideal build? Explore top off-roading destinations in California and tips for an unforgettable adventure from Audiomobile Hayward to understand what your vehicle truly needs for the specific trails you plan to run this summer.
You can also explore the Compustar versus Viper security system comparison for Hayward drivers and the Compustar alarm versus Viper: which car alarm system offers better protection in Hayward if you are choosing between systems during Phase 3?
Northern California Trails Worth Preparing For This Summer
Part of building a capable overlanding rig is knowing what you are building it for. Here are the trail areas that Hayward drivers have the best access to and what your vehicle needs to handle them well.
Carnegie State Vehicular Recreation Area
Carnegie SVRA is the closest dedicated off-highway vehicle area to the East Bay, at roughly 75 miles east toward Tracy. Carnegie offers trails ranging from beginner dirt roads to serious technical climbs across its 1,500 acres of rolling hills. A stock 4×4 can handle the easier zones, but the more challenging terrain rewards a lift, all-terrain tires, and improved suspension.
The Rubicon Trail
The Rubicon Trail in the Lake Tahoe area is one of the most iconic off-road routes in California and one of the most technically demanding. A full Rubicon run requires a vehicle that is properly built: lift, skid plates, lockers or traction control upgrades, and a serious winch. It is an achievable goal for a well-built rig with a capable driver, and many Bay Area overlanders make the Rubicon a summer highlight.
Diablo Range Backcountry
The Diablo Range backcountry accessible from Livermore, Morgan Hill, and Hollister offers accessible dirt roads and fire roads within an hour of Hayward. These routes are appropriate for high-clearance vehicles without extreme modification, making them ideal for drivers who are building incrementally and want trail experience close to home.
Sierra Nevada Forest Roads
Sierra Nevada fire roads and forest routes become accessible from late May through September and offer some of the most scenic overlanding in California. Trails in the Stanislaus, Eldorado, and Tahoe National Forests connect remote campsites, high-altitude meadows, and granite terrain that rewards a capable, well-equipped vehicle. These routes are within four hours of Hayward and represent an ideal summer destination for a properly built rig.
Before your next adventure, make sure your rig is equipped by reading winch and light bar installation in Hayward: must-have upgrades for off-road adventures.
Ready to Build Your Summer Rig in Hayward?
Summer adventure season in Northern California moves fast. The best trails have weather windows that open in late May and close by October. A vehicle that is not ready by June is sitting out months of the best overlanding conditions the Bay Area has access to.
Audiomobile has been outfitting vehicles for off-road use in Hayward since 1975. Our shop at 24031 Mission Blvd handles the full spectrum of what a serious overlanding build requires, from electrical infrastructure and lighting to security systems, dashcams, audio, communication systems, and camera integration. We carry and install brands that serious off-road drivers use, and our installation quality is what separates a reliable build from one that starts causing problems the moment the trail gets rough.
If you are ready to start your build or want to discuss what your vehicle needs for the trails you plan to run this summer, visit our Audiomobile homepage to explore all services, check our FAQ page for quick answers, or reach out through the Audiomobile contact page to schedule a consultation. You can also learn about our experienced team on the Audiomobile team page.
Follow Audiomobile Hayward on Facebook and Instagram to see real overlanding builds, off-road upgrades, lighting installs, security integrations, and summer-ready adventure rigs from across the Bay Area.
Frequently Asked Questions
1. What is the most important first upgrade for an overlanding vehicle?
A dual battery system is the most foundational upgrade for any vehicle that will be used for camping and off-road adventures. It separates your starting battery from the battery that powers accessories, eliminating the risk of waking up to a drained battery at a remote campsite. All other electrical accessories, including lighting, fridges, and communication devices, depend on having a reliable power source in place first.
2. Do I need a lift kit before other overlanding upgrades?
Not necessarily. A lift kit improves ground clearance and allows larger tires, which matters for technical terrain. But if you are doing mostly fire roads and moderate trails, you can build out your electrical, lighting, and security systems while your suspension remains stock or lightly modified. Prioritize based on the terrain you actually plan to drive, not the maximum possible capability of a fully built rig.
3. What kind of communication system should I install for overlanding in Northern California?
GMRS radio is the best starting point for most drivers. A quality GMRS unit with a properly mounted antenna gives you reliable group communication on most Northern California trails, costs around $300, and requires only a $35 FCC license valid for 10 years. Ham radio offers a greater range for remote terrain and emergency use. A satellite messenger like the Garmin inReach Mini 2 is the safest backup for any trip where cell service will be unavailable.
4. Is auxiliary lighting installation something I can do myself?
Basic bar mounts with plug-and-play wiring harnesses can be DIY installed with reasonable mechanical confidence. However, a complete auxiliary lighting system with multiple zones, a proper relay setup, an in-cab switch panel, and correctly sized wiring for each circuit requires professional installation. Poor wiring on high-draw lighting circuits is a fire risk and a reliability problem that becomes very difficult to diagnose on a remote trail.
5. What PSI should I air down to for off-road driving?
The right PSI depends on terrain type, tire size, and load. Most trucks and SUVs air down to 18 to 22 PSI for packed dirt and gravel roads and as low as 12 to 15 PSI for soft sand. Always consult your tire manufacturer’s minimum sidewall pressure rating before going below that threshold. A quality portable compressor is mandatory for airing back up to highway PSI before returning to pavement.
6. How does a winch installation work at Audiomobile?
Our team handles the full installation: mounting the winch to your existing or new front bumper, running and correctly sizing the power cables to the battery, installing proper high-current fuse protection, and routing the control wiring to a clean, accessible location in the cab. We also advise on synthetic rope versus cable, fairlead type, and the recovery accessories that complete a functional winch setup.
7. Can I get a backup camera installed on my truck or SUV for trail use?
Yes. We install backup camera systems on all truck and SUV types, including multi-camera setups with side-view and forward-facing cameras for complete trail visibility. A well-installed trail camera setup integrates with your head unit or a dedicated monitor and activates automatically when you need it. Visit our backup camera installation service page for more details on what we offer.
8. What security system is best for vehicles parked at trailheads?
A Compustar alarm with a kill switch and GPS tracking gives you the most complete trailhead protection. The kill switch prevents engine start even if someone bypasses or relays the key fob signal. GPS tracking lets you monitor your vehicle’s location in real time. A dashcam with parking mode records any approach or contact with the vehicle. Combined, these layers make your rig a far harder target than an unprotected truck parked at the same trailhead.
9. How long does a full overlanding electronics build take at Audiomobile?
It depends on the scope. A dual battery system installation takes roughly four to six hours. A full build covering electrical, lighting, security, audio, and camera systems is typically spread across two to three appointments. Our team will give you a realistic timeline when we assess your vehicle. Most drivers phase their build across spring and early summer to have everything in place before peak trail season.
10. What Northern California trails are accessible from Hayward without a heavily modified vehicle?
Carnegie State Vehicular Recreation Area, the Diablo Range fire roads, and many Sierra Nevada forest roads are accessible to high-clearance 4×4 vehicles without extreme modification. All-terrain tires and a modest suspension lift significantly expand your options. Trails like the Rubicon require a fully built rig. Starting with easier terrain lets you understand where your vehicle’s limits are before committing to a more aggressive build.
11. What should I look for in a roof rack for overlanding?
Look for a roof rack rated to handle the weight of your intended load, including a rooftop tent plus gear. Verify that the rack is compatible with your specific vehicle’s roof rails or mounting points. Powder-coated steel racks are more durable for off-road use. Aluminum racks save weight but may flex under heavy loads. Ensure the rack does not exceed your vehicle’s roof load rating, and plan your load distribution before final purchase.
12. Does a dual battery system work for running a refrigerator at camp?
Yes. A quality AGM house battery sized at 100Ah or larger will run a 12-volt compressor fridge drawing 3 to 5 amps continuously for 24 to 36 hours without recharging. A lithium iron phosphate battery of the same rated capacity delivers even more usable power since it can be safely discharged to a lower state of charge than AGM. Adding solar charging extends this indefinitely at remote campsites with adequate sun exposure.
13. Is a dashcam useful for overlanding beyond trail documentation?
Yes, significantly. A dashcam with parking mode provides trailhead security by recording any motion or impact while you are hiking or sleeping at camp. It also documents any accidents or incidents on the road to and from the trail. Some drivers use dashcam footage for insurance claims related to trailhead damage. Front and rear dashcam coverage together provides comprehensive documentation of the entire trip.
14. What is the difference between GMRS and ham radio for off-road use?
GMRS is the more accessible option: it requires a $35 FCC license, no exam, and equipment costs $150 to $400 for a quality unit. It provides a good range for group communication on most trails and can access repeater networks in many parts of Northern California. Ham radio requires passing a technician license exam but offers more power, more frequencies, and access to a much larger repeater network that covers remote terrain where GMRS reaches its limits. Many serious overlanders carry both.
15. Does Audiomobile handle full overlanding builds from start to finish?
Yes. Our team at Audiomobile in Hayward handles all of the electronic and electrical components of an overlanding build: dual battery systems, auxiliary lighting, winch wiring, vehicle security, GPS tracking, dashcams, backup cameras, audio systems, GMRS and ham radio installation, and all associated wiring and integration work. We have served Hayward and East Bay drivers since 1975 and work on all vehicle types from daily-driven Tacomas to dedicated overland rigs. Contact us or stop by the shop at 24031 Mission Blvd to discuss your specific vehicle and build goals.
David Trinh