
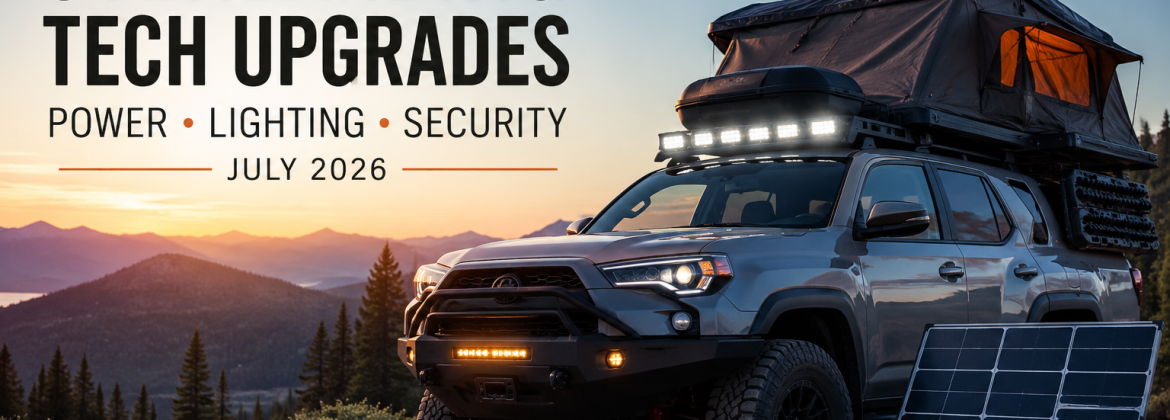
July is prime overlanding season in Northern California. The Sierras are accessible, Moab is dry and fast, and the Coastal Range trails around Livermore and Hollister are in great condition. Overlanders across the Bay Area, including Fremont, Oakland, and San Jose, are putting the final touches on their overlanding vehicle build Bay Area, ensuring their rigs are ready for off-grid adventures. The difference between a rig that handles a week off-grid with confidence and one that limps back on the first day often comes down to the electrical system, lighting setup, and vehicle security planning.
Call +1 510-930-0881 to book your appointment now!
This guide covers what actually matters for overlanding tech in July 2026: how to size and build an off-grid power system that does not let you down, how to set up lighting that is both trail-capable and California street-legal, and what security layers make sense when your rig contains thousands of dollars in equipment sitting at a trailhead or a remote campsite overnight.
If you are building or upgrading your overlanding rig in the Bay Area and you want professional installation of any of these systems, Audiomobile Hayward handles the full electrical scope, from solar and secondary batteries through auxiliary lighting, GPS tracking, and alarm systems, for drivers across Hayward, Fremont, Newark, Union City, San Leandro, Oakland, and San Jose.
Why Your Overlanding Power System Needs a Redesign for 2026
The load requirements of a modern overlanding rig have changed significantly from what they were even three years ago. Rooftop tents with integrated LED strips. 12V compressor fridges running 24 hours a day at 30 to 50 amp-hours per day. Starlink satellite internet terminals drawing 50 to 75 watts continuously. Dual dashcam setups with parking mode hardwires. Phone and tablet charging. Camp lighting. Action camera batteries. Drone charging. Water pump controllers. The cumulative draw on a well-equipped modern rig would have sounded absurd for a camping vehicle a decade ago.
Lead-acid and AGM auxiliary batteries are largely outdated for serious overlanding applications in 2026. LiFePO4 (lithium iron phosphate) batteries have become the correct baseline choice for any rig that carries significant electrical load, and the reasons are straightforward:
- LiFePO4 batteries deliver usable capacity down to approximately 20 percent state of charge, versus the 50 percent usable capacity limit that protects AGM batteries from premature failure
- A 100Ah LiFePO4 battery provides roughly 80Ah of usable power, whereas a 100Ah AGM provides 50Ah. The same capacity in LiFePO4 costs you less space and less weight for equivalent usable output.
- LiFePO4 accepts a significantly higher charge rate, meaning faster recharge from solar input or from the alternator during driving
- Cycle life of 2,000 to 3,000 full charge cycles versus 300 to 500 for AGM, making them a long-term investment even at higher upfront cost
- Built-in Battery Management Systems (BMS) in quality LiFePO4 units provide overcurrent, overvoltage, undervoltage, and thermal protection
For most Bay Area overlanders doing weekend to seven-day trips, a secondary LiFePO4 battery bank of 100 to 200 Ah provides adequate capacity when paired with solar input. Larger expedition rigs running a dual-zone fridge, onboard air compressor, camp kitchen, and satellite internet may need 300Ah or more to maintain autonomy over multiple days without driving.
How to Size Your Solar Input for Northern California Overlanding
Solar is the preferred recharge source for multi-day trips because it is silent, emissions-free, and does not depend on driving time or engine hours to maintain battery state of charge. But solar panels need to be sized to the actual energy consumption of the rig and the expected conditions of the region where you’re traveling.
In Northern California during July, peak solar irradiance is favorable. The Sierras, the Central Valley, and the coastal ranges all receive strong direct sunlight during summer months, typically six to eight hours of effective solar generation per day in good conditions. That said, tree cover, cloud cover, dust accumulation on panels, and shade from a rooftop tent all reduce actual output from theoretical maximums.
A practical sizing formula for a Bay Area overlander:
- Calculate daily consumption in amp-hours. A 12V compressor fridge at 40Ah, LED camp lighting at 8Ah, phone and device charging at 10Ah, and dashcam parking mode at 6Ah total approximately 64Ah per day as a baseline for a moderate-load rig.
- Multiply by a solar harvest factor. In July in Northern California, 100 watts of panel output typically delivers 30 to 40Ah per day of net charge after losses. So a 64Ah daily consumption rig needs approximately 200 watts of solar input as a minimum, and 300 watts provides a useful buffer.
- Add a DC-DC battery-to-battery charger for alternator charging during driving. A 40A DC-DC charger replenishes approximately 40Ah per hour of highway driving, bridging gaps when solar harvest is low.
MPPT (Maximum Power Point Tracking) solar charge controllers outperform PWM controllers by 20 to 30 percent in real-world conditions, particularly in partial shade or early morning and late afternoon when irradiance is lower. MPPT controllers are the correct choice for any solar installation on a rig where electrical capacity matters.
Audiomobile Hayward designs and installs complete solar system design and build solutions for overlanding vehicles across the Bay Area. This includes panel selection and mounting, MPPT controller specification, LiFePO4 battery installation, DC-DC charging integration, and wiring that follows safe automotive electrical standards throughout.
Thinking about adding solar or a secondary battery system to your overlanding build? Contact Audiomobile Hayward for a power system consultation at +1 510-839-1992. We design and install complete off-grid power systems for Bay Area overlanding vehicles.
Auxiliary Lighting for Overlanding: Trail Performance and California Street Compliance
Lighting is where overlanding builds generate more enthusiasm and more legal confusion than almost any other modification category. The desire is understandable: trail driving at night genuinely requires more light than headlights provide, and a quality LED light bar or auxiliary driving light setup transforms night trail navigation. The complication is that California’s vehicle code has specific rules about how and when those lights can be used on public roads.
Here is the practical framework for a California-compliant overlanding lighting setup:
LED Light Bars
LED light bars are classified as auxiliary off-road lighting under California Vehicle Code Section 25104. They are legal to install on your vehicle. They are not legal to use on California public roads while turned on. For Bay Area overlanders who drive to trailheads on public roads and then use their rigs on dirt trails, this means a magnetic or snap-on light bar cover is a required part of the setup. Most quality light bars come with covers. The cover goes on when you hit pavement and comes off at the trailhead. This is not optional, and CHP enforcement on this point is active, particularly in the East Bay Hills, where overlanders frequently transition between road and trail.
Bumper- Mounted Auxiliary Driving Lights
Auxiliary driving lights mounted at or below headlight height (22 to 54 inches from the ground) can be street-legal if they emit white or amber light, are SAE or DOT certified, and the total number of front-facing illuminated lamps does not exceed four simultaneously. A pair of properly mounted and certified auxiliary fog or driving lights is a legal addition to a street-driven rig that also improves trail visibility when combined with high beams off-road.
Roof-Mounted vs. Bumper-Mounted: The Key Distinction
Roof-mounted light bars on most trucks and SUVs sit above 54 inches from the ground, which exceeds the legal headlight mounting height limit. This means they cannot legally function as driving lights on public roads regardless of their certification status. A bumper-mounted or grille-mounted bar can potentially fall within the legal mounting range depending on your vehicle’s ride height and the specific mounting position. If you’ve lifted your rig significantly, a previous legal mounting position may no longer be legal after the lift.
Overlanding-Specific Lighting Tips for Northern California
For Sierras and eastern California desert trips where CHP is less present than Bay Area roads, the practical concern shifts from street legality to trail performance and safety. Here, the relevant factors are beam pattern (spot vs. flood vs. combo), color temperature (warm amber for dust penetration vs. white for distance), and the interaction of your lighting with your recovery camera or dashcam setup when reversing in low-light conditions.
The Audiomobile Hayward team builds overlanding lighting setups that are designed to comply with California road law while maximizing trail performance. The overlanding build and accessories service covers full lighting system design, including switch panel integration, proper relay-fused wiring, and California-compliant mounting and circuit configuration.
For additional reading on overlanding lighting setup and common installation errors to avoid, the overlanding lighting setup guide and how to avoid common overlanding lighting installation mistakes are both worth reviewing before making component decisions.
Ready to build a proper overlanding lighting system for your Bay Area rig? Talk to the Audiomobile Hayward overlanding team at +1 510-839-1992. We handle trail lighting, switch panels, relay wiring, and California compliance for builds across Hayward, Fremont, Oakland, and San Jose.
Off-Grid Security: Protecting Your Rig and Your Gear at the Trailhead
Overlanding vehicles are targets. They carry expensive gear, they are often parked in semi-remote locations with limited foot traffic, and they can sit for extended periods at trailheads while owners are out on a hike or a multi-day trail run. Bay Area theft rates, particularly in Fremont, Oakland, and along popular Sierras corridor trailheads, make vehicle security a legitimate operational concern for anyone with a serious build.
The security architecture for an overlanding rig needs to account for conditions that differ from urban vehicle security: remote locations without cellular coverage, extended parking periods measured in days rather than hours, and the presence of significantly more valuable cargo than a typical commuter vehicle carries.
Multi-Layer Vehicle Alarm Systems
A quality vehicle alarm system remains the first line of defense. For overlanding rigs in the Bay Area, systems from Compustar offer the most practical combination of two-way remote monitoring range, customizable sensor zones, and integration with additional security layers. The extended-range remotes on Compustar systems provide feedback from distances that matter when you’re camped two hundred meters from your truck at a trailhead.
Glass break sensors are a particularly important addition for overlanding vehicles. Because the cargo is visible in the bed or through windows, smash-and-grab theft is a real risk even in remote locations. Glass break detection adds a sensor category beyond the standard door and hood triggers. Our blog on why glass break sensors are a must-have for Bay Area drivers explains the technology and installation considerations in detail.
Kill Switches and Immobilizers
A hidden kill switch that interrupts the starter circuit or fuel delivery system prevents a vehicle from being driven away even if an opportunist gains entry. For high-value overlanding builds, a kill switch is an inexpensive addition that significantly raises the difficulty level for a would-be thief. Push-button start vehicles require a different approach to immobilization, typically involving a relay in the CAN bus circuit or a secondary hidden authentication step.
The Compustar alarm and kill switch comparison blog and the overview of Compustar T13 security systems with kill switch integration both provide detailed context for Bay Area drivers evaluating this combination.
GPS Tracking for Remote Recovery
GPS tracking for overlanding rigs serves a dual purpose: theft recovery and trip safety. For theft recovery, a GPS tracker that operates independently of the vehicle’s main electrical system and transmits location on its own cellular connection is the correct specification. A tracker that draws power only from the vehicle and transmits only when the vehicle is running does not help you locate a stolen rig that has been parked somewhere.
For trip safety, GPS trackers that share real-time location with a trusted contact provide a meaningful safety layer when a solo overlander is in an area without reliable cell service. Satellite-capable tracking devices have become more affordable in 2026 and are worth serious consideration for anyone who regularly overlanders alone or in remote regions without cell coverage.
Bay Area GPS tracking installation options and legal considerations for California vehicles are covered in the GPS tracking for cars guide and the comprehensive GPS tracking resource page on the Audiomobile website.
Dashcam Parking Mode for Unattended Rigs
A dashcam with hardwired parking mode provides time-lapse or motion-triggered recording while the vehicle is parked and unattended. At a trailhead, this can capture vehicle and plate information for anyone who approaches, touches, or breaks into the rig while you’re away. Dual-channel setups with front and rear cameras cover both approaches. For overlanding rigs that may be parked for multiple days, the battery consumption of parking mode recording needs to be factored into the secondary battery sizing calculation.
Audiomobile Hayward’s dashcam sales and installation service includes proper hardwiring with parking mode circuits connected to the secondary battery circuit where appropriate, so parking mode operation does not drain the starter battery.
Electrical Troubleshooting and Vehicle Diagnostics for Overlanding Prep
Before a major trip, particularly one involving multiple days in remote locations, a pre-departure electrical diagnostic is worth doing. Overlanding builds accumulate electrical complexity over time: added circuits, modified factory wiring, auxiliary battery connections, solar input circuits, lighting switches, and relays. The more complex the electrical system, the more opportunity for a problem to develop.
Common pre-trip electrical issues found in Bay Area overlanding vehicles include the following:
- Battery terminals with corrosion or loose connections that create voltage drop under load, causing intermittent failures in electronics
- Relay contacts that have oxidized and fail to make a clean connection, causing auxiliary lights or compressors to work intermittently
- Fuse holders that have not been properly sealed against moisture, leading to corrosion inside the fuse block
- Ground connection failures, which are the single most common cause of mysterious electrical gremlins in modified vehicles
- Solar charge controller settings that have not been updated to match the installed battery chemistry after a battery upgrade
- Alternator charging that is not properly isolated from the secondary battery, allowing a deeply discharged aux battery to drag down the starter battery
The blog on identifying blown fuses in your car console covers the basics of fuse diagnosis, but for a comprehensive pre-trip electrical check on a complex build, professional inspection by a shop familiar with auxiliary electrical systems is the more reliable approach. The electrical troubleshooting service at Audiomobile Hayward is specifically equipped for modified vehicles with non-factory electrical systems.
Heading out on a Sierra or coastal trail run this July? Call +1 510-839-1992 and book a pre-trip electrical diagnostic at Audiomobile Hayward before you head out. Catching a wiring issue in the shop is far better than diagnosing it sixty miles from the nearest paved road.
Backup cameras are legally required on all new passenger vehicles, but older overlanding rigs and trucks without factory cameras benefit enormously from aftermarket retrofits. Trail navigation involves frequent reversing in tight spaces, around obstacles, and in low-light conditions where depth perception is impaired. A wide-angle backup camera with night vision capability is not a luxury on a serious overlanding rig; it is a safety system.
For overlanding applications specifically, look for backup cameras with:
- Wide-angle lens coverage of 120 to 170 degrees to see around the full width of a lifted truck or truck bed accessories
- Infrared night vision for low-light reversing at a campsite in the dark
- Waterproof rating of IP67 or better for exposure to mud, dust, water crossings, and heavy rain
- Rugged mounting hardware that can tolerate trail vibration without losing alignment
Wireless backup cameras are popular for their clean installation on overlanding rigs where running a camera cable from the rear of a long-bed truck or truck with a bed-mounted camper shell is complex. However, wired installations provide more reliable signal quality and eliminate the possibility of wireless interference, which matters when you are in remote areas with unpredictable RF environments. The guide to wireless backup cameras covers the practical tradeoffs between wired and wireless options for overlanding applications.
Aftermarket blind spot monitoring systems using radar or ultrasonic sensors are also increasingly common on overlanding builds. Wide-body truck setups with bed-mounted accessories, roof racks, and side-mounted tool storage create significant blind zones that factory-style mirror checks do not cover adequately. An aftermarket blind spot detection system adds a layer of awareness that pays dividends on narrow single-lane dirt roads where oncoming traffic or trail obstacles appear with little warning.
Connectivity and Communication for Remote Overlanding
Off-grid connectivity has evolved significantly. The combination of a GPS tracker, a satellite messenger, a CB or ham radio, and a Starlink terminal covers most communication scenarios for serious overlanding trips in 2026. Each plays a different role.
Satellite Messengers and SOS Devices
Garmin inReach, SPOT, and Zoleo devices provide two-way satellite text messaging and SOS capability in areas with zero cell coverage. These are standalone devices that do not require vehicle electrical integration beyond USB charging, but they deserve a spot in every overlanding kit as a baseline safety layer.
CB and Ham Radio
CB radio remains the standard for trail communication within a group of vehicles and for monitoring channel 19 for highway truckers in remote areas. Ham radio provides extended range and access to repeater networks that can reach rescue services from more remote locations. For serious overlanders, a properly installed mobile ham radio transceiver with a vehicle-mounted antenna is a meaningful safety upgrade compared to a handheld unit. The ham and CB radio installation guide covers installation considerations for Bay Area overlanders.
Starlink for Extended Camps
The Starlink Roam plan provides satellite internet access in most of North America, including areas well outside cellular coverage. For overlanders who work remotely or who plan extended base camps, the ability to maintain internet connectivity changes the calculus of how long and how far a trip can extend. Starlink terminal power consumption needs to be factored into the secondary battery and solar sizing calculation, as continuous operation draws 50 to 75 watts depending on conditions.
Professional Overlanding Build Services for Bay Area Drivers
Audiomobile Hayward builds overlanding rigs for drivers across the East Bay and South Bay, including Hayward, Fremont, Newark, Union City, San Leandro, Oakland, and San Jose. The scope of an overlanding build varies widely, from a single-system upgrade (adding solar, or adding a GPS tracker, or adding a lighting setup) to a comprehensive full-electrical build that covers power systems, lighting, security, communication, and camera systems in a single, planned installation.
The advantage of a comprehensive build approach over piecemeal upgrades is that the electrical systems are designed to work together from the start. A secondary battery sized correctly for the actual load of all planned accessories. A solar input circuit designed for the battery chemistry and capacity installed. Lighting wired through properly rated relays and fuses with a clean switch panel rather than a growing tangle of toggle switches and wire splices. A security system integrated with the vehicle’s existing CAN bus rather than fighting it.
Drivers who are in the early planning phase of an overlanding build are welcome to come in for a build consultation before committing to specific components. The team at Audiomobile Hayward can review your vehicle, your planned use case (weekend warrior vs. week-long expeditions vs. full-time vanlife), and your budget to develop a system design that makes sense as a complete solution.
For drivers interested in the vehicle security side of an overlanding build specifically, the alarm system service and the complete security system service page outline the available options. For overlanding lighting specifically, the auxiliary lighting service and the electricals and lighting service pages cover what the installation process involves.
Building an overlanding rig in the Bay Area for summer 2026? Schedule a build consultation at Audiomobile Hayward. OR call +1 510-839-1992 to directly reach out to the Audiomobile Hayward team. Whether you need one system or a full electrical build, the team will design a setup that works correctly from day one.
Build Your Rig Right Before the Season Gets Away From You
July overlanding season in Northern California is well underway, and the windows for Sierra trips, coastal range security trail runs, and desert overnighters are open right now. A rig that is properly equipped with a reliable power system, compliant and capable lighting, and layered off-grid security handles these conditions without the electrical failures, the lighting issues, and the theft anxiety that undermine trips built on under-equipped vehicles.
Audiomobile Hayward serves the Bay Area’s overlanding community from a fully equipped shop in Hayward. If your rig has a power system that is not keeping up with your load, lighting that you are not confident about on California roads, or security that does not match the value of the equipment you’re carrying, the time to address it is before the trip, not during. Visit the contact page to book a consultation or an appointment.
Stay connected with the Audiomobile Hayward community for the latest build updates, tech guides, and Bay Area overlanding coverage:
Facebook: facebook.com/audiomobileoakland
Instagram: @audiomobilehayward
Frequently Asked Questions
Q: What is the best battery type for an overlanding vehicle in 2026?
LiFePO4 (lithium iron phosphate) batteries are the correct choice for overlanding applications in 2026. They provide approximately 80 percent usable capacity versus 50 percent for AGM, accept faster charge rates from solar and alternator sources, and have cycle lives of 2,000 to 3,000 cycles versus 300 to 500 for AGM. The higher upfront cost is offset by longer service life and the ability to run more of your daily electrical consumption from the same physical battery size.
Q: How much solar do I need for a week-long overlanding trip in California?
A rig running a 12V compressor fridge, LED camp lighting, device charging, and a dashcam in parking mode draws approximately 60 to 80 amp-hours per day as a baseline. In Northern California during July, 100 watts of solar panel output delivers roughly 30 to 40Ah per day under real conditions. A 200 to 300-watt solar setup paired with a DC-DC charger for alternator input provides adequate coverage for most moderate-load weekend to week-long trips. Larger loads including Starlink, air compressors, or induction cooking require proportionally more capacity.
Q: Are LED light bars legal to use on California roads?
LED light bars are legal to install on California vehicles but cannot be used on public roads while turned on. California Vehicle Code Section 25104 classifies them as auxiliary off-road lighting, which must be covered or turned off when driving on any highway or public road. A magnetic or snap-on cover is the required solution for Bay Area overlanders who drive to trailheads on public roads. Off-road use on trails is unrestricted by California law.
Q: What security systems work best for overlanding rigs left at trailheads?
A layered approach works best for trailhead security. A vehicle alarm system with glass break sensors covers the first layer. A hidden kill switch that prevents the vehicle from being started adds a second layer. A GPS tracker with independent cellular transmission provides location data even if the vehicle is towed. A hardwired dashcam with parking mode recording provides visual evidence of any approach or break-in. Compustar alarm systems are well-suited for overlanding applications due to their extended remote range and customizable sensor zones.
Q: What is the difference between a DC-DC charger and a solar charge controller?
A DC-DC battery-to-battery charger (also called a B2B charger) manages the charging of your secondary battery from the vehicle alternator while driving. It isolates the secondary battery from the starter battery to prevent the starter battery from being drained, and it delivers a correctly profiled charge current for the secondary battery chemistry. A solar charge controller manages the input from your solar panels to the secondary battery, also providing chemistry-appropriate charging. Both are typically used together in a complete overlanding power system.
Q: Do I need a ham radio license to install and use a ham radio in my overland vehicle?
Yes. Transmitting on amateur (ham) radio frequencies in the United States requires an FCC license. The technician-class license is the entry-level certification and covers most VHF and UHF frequencies used for trail and local communication. The exam is straightforward and widely available through testing organizations across the Bay Area. You can install a ham radio in your vehicle before obtaining a license but cannot legally transmit until the license is issued. CB radio requires no license and is a legal alternative for trail communication.
Q: How do I power a Starlink terminal from my overlanding electrical system?
A Starlink Roam terminal draws 50 to 75 watts continuously, which translates to approximately 50 to 75Ah per day at 12V if operated continuously. Most overlanders run Starlink for a few hours during working hours rather than continuously, reducing actual daily draw to 10 to 25 Ah in typical use. The terminal connects via a 120V AC outlet, so it requires either an inverter connected to the secondary battery or the Starlink 12V DC power adapter available for vehicle installation. Factor Starlink consumption into your overall power budget when sizing your secondary battery and solar input.
Q: Can I install all these overlanding systems at Audiomobile Hayward in one visit?
Yes. Audiomobile Hayward handles comprehensive overlanding builds covering solar and secondary battery systems, auxiliary lighting, alarm and security systems, GPS tracking, backup cameras, dashcams, and electrical troubleshooting, all in one location. For a full build, the process typically takes two to four days depending on the scope. A pre-build consultation is recommended to finalize the component list and installation plan before work begins. The shop serves drivers across Hayward, Fremont, Newark, Union City, San Leandro, Oakland, and San Jose.
Q: What is parking mode on a dashcam, and does it drain my battery?
Parking mode enables a hardwired dashcam to record motion-triggered or time-lapse video while the vehicle is parked and the engine is off. It draws low continuous power from the vehicle’s electrical system. When connected to a secondary battery rather than the starter battery, parking mode recording can run for multiple days without affecting starting capability. Audiomobile Hayward wires parking mode circuits to the secondary battery system on overlanding rigs specifically to avoid starter battery drain during extended trailhead parking.
Q: Where can I get a complete overlanding electrical build in the Bay Area?
Audiomobile Hayward provides comprehensive overlanding vehicle builds, including solar power systems, secondary LiFePO4 battery installation, auxiliary lighting, alarm and kill switch systems, GPS tracking, dashcams, backup cameras, and electrical diagnostics for drivers across Hayward, Fremont, Newark, Union City, San Leandro, Oakland, and San Jose.
Gear Up for July 2026 Overlanding Adventures – Do not Wait!
The summer trails are calling, and your Bay Area overlanding rig needs to be ready. From reliable LiFePO4 power systems to California-compliant LED lighting, GPS tracking, and advanced security setups, Audiomobile Hayward ensures your vehicle is fully equipped for off-grid adventures.
Spots for professional overlanding builds are filling fast this season. Call +1 510-619-2645 now to book your consultation and get your rig trail-ready, safe, and fully optimized for every adventure from the Sierras to the Coastal Range!
David Trinh