
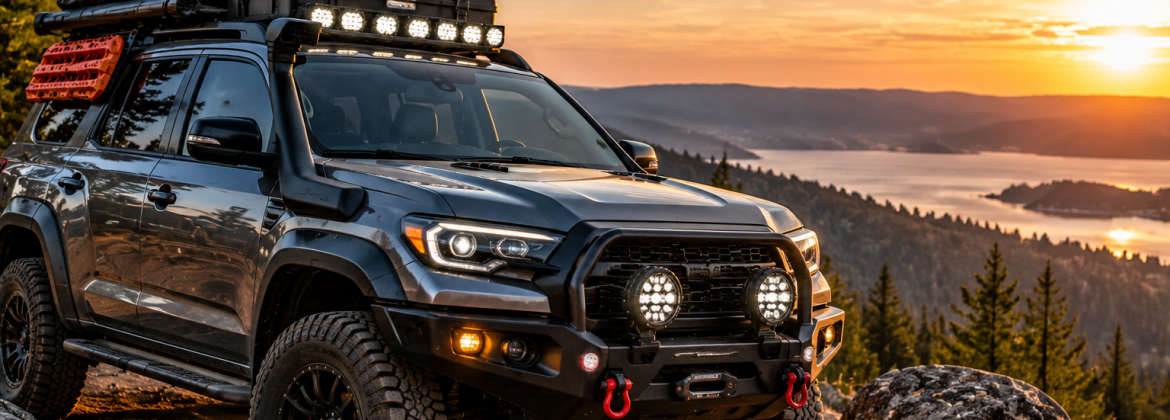
As fall brings cooler temperatures and prime conditions for backcountry travel, overlanding accessories installation becomes a priority for Bay Area drivers preparing their vehicles for longer, more remote trips. Whether you are building out a vehicle for the first time or adding to an existing setup, getting power, lighting, and communication systems right makes a real difference once you are away from cell service and paved roads.
This article walks through the core systems every overlanding build depends on, from auxiliary power to lighting to communication equipment, and why professional installation matters when your vehicle needs to perform reliably far from a repair shop. For a look at build options available locally, visit the Overlanding Build & Accessories page.
Ready to Build Your Adventure Vehicle Setup?
Planning an overlanding build requires more than adding accessories one at a time. Audiomobile Hayward helps Bay Area drivers design and install reliable overlanding accessories, including auxiliary power systems, off-road lighting, charging solutions, and communication equipment. Call Audiomobile Hayward at +1 510-839-1992 to discuss your custom overlanding build.
Why Fall Is the Right Time to Prepare an Overlanding Vehicle
Fall is a popular season for overlanding trips throughout Northern California and the wider Bay Area, offering cooler daytime temperatures and fewer crowds at popular backcountry destinations compared to peak summer months.
Preparing your vehicle before the season gets underway gives you time to plan and install upgrades properly, rather than rushing a build together right before a trip. Many overlanding builds involve multiple interconnected systems, including power, lighting, and communication equipment, and taking the time to plan how these systems work together generally leads to a more reliable result than adding accessories one at a time without a broader plan.
This is especially true for anyone building out a vehicle for the first time. It is common to see a build grow piece by piece over a season, with a light bar added one month and an auxiliary battery added the next, without much thought given to how the two systems will eventually work together. Starting with a clear plan for power, lighting, and communication, even if the build itself happens in stages, tends to result in a more coherent and dependable setup by the time fall trips begin.
The Three Essentials: Power, Lighting & Communication
Most overlanding vehicle builds, regardless of budget or vehicle type, revolve around three essential categories of upgrades.
Power is the foundation that everything else depends on, since auxiliary lighting, communication equipment, refrigerators, and charging systems all need a reliable power source separate from the vehicle’s starting battery.
Lighting covers both off-road driving lights for navigating trails after dark and auxiliary lighting for tasks like setting up camp or working around the vehicle at night.
Communication becomes increasingly important the farther you travel from cell service, whether through a ham radio setup or other communication equipment designed for remote areas.
Thinking through these three categories together, rather than focusing on one in isolation, tends to result in a more balanced and genuinely useful overlanding build.
Auxiliary Power Systems for Overlanding
An overlanding vehicle typically needs power for far more than just starting the engine, which is why a dedicated auxiliary power system is one of the most common first upgrades for a serious build.
Auxiliary power systems generally include a secondary battery, isolated from the vehicle’s starting battery so accessories cannot drain the power needed to start the engine, along with charging sources like an alternator-based charging system or solar panels. The right auxiliary power setup depends on how you use your vehicle. Someone doing short weekend trips has different power needs than someone planning extended multi-day trips fully off-grid, and the auxiliary power system should be sized around your actual usage rather than a generic recommendation. You can browse the Audiomobile Hayward home page for the shop’s full range of vehicle build and installation work.
Portable Power Stations & Vehicle Power
Portable power stations have become an increasingly popular option for overlanding builds, offering a self-contained battery and inverter unit that can be charged from the vehicle, solar panels, or occasionally shore power.
Compared to a hardwired auxiliary battery system, a portable power station offers more flexibility, since it can be removed from the vehicle and used independently, for example, to power equipment at a campsite away from the vehicle itself. Portable power stations can be integrated into a vehicle’s charging system so they recharge automatically while driving, which combines convenience with the reliability of a properly wired power source. Whether a portable power station, a hardwired system, or a combination of both makes the most sense depends on how you plan to use power both in and away from the vehicle.
Off-Road Lighting Installation
Off-road lighting installation adds driving lights specifically designed to improve visibility on trails, dirt roads, and other conditions where factory headlights are not sufficient.
These lighting systems typically include additional forward-facing lights mounted on the bumper, roof rack, or grille area, providing a wider or more powerful beam pattern than factory headlights alone. Off-road lighting is intended for use on trails and in conditions where standard road lighting is not adequate, and proper installation includes wiring the lights to a switch that allows them to be used only when appropriate, since some lighting configurations are not intended or legal for use on public roads. A knowledgeable installer can help explain the relevant considerations for your specific setup and driving plans.
Auxiliary Lighting for Trails & Campsites
Beyond forward-facing off-road lighting, many overlanding builds include auxiliary lighting designed for tasks around the vehicle rather than driving itself.
This can include rear-facing work lights for setting up camp after dark, side lighting for awning areas, and rock lights or under-vehicle lighting for visibility while navigating technical terrain at low speeds. Auxiliary lighting is generally wired to a separate switch panel, allowing you to use only the lights you need for a specific task rather than running the entire lighting system at once, which also helps manage power consumption from your auxiliary battery. Learn more about available options on the Auxiliary Lighting page.
Communication Systems for Remote Travel
Cell service becomes unreliable or nonexistent in many of the remote areas overlanding trips typically visit, which makes a dedicated communication system an important part of a well-planned build.
Options range from simple handheld radios for communicating between vehicles in a group to more capable mobile radio systems mounted permanently in the vehicle, to satellite-based communication devices for areas completely outside radio range. The right choice depends heavily on where you typically travel and whether you usually travel solo or as part of a group, since group travel benefits significantly from reliable vehicle-to-vehicle communication that a phone cannot always provide once you are off-grid.
Ham Radio Installation & Vehicle Integration
Ham radio, formerly known as amateur radio, is a popular communication option among experienced overlanders because of its long range and reliability in areas without cell service, though it does require an amateur radio license to operate legally.
A properly installed ham radio setup typically includes a mounted radio unit, an externally mounted antenna positioned for optimal reception, and wiring routed to the vehicle’s power system in a way that does not interfere with other electronics. Antenna placement in particular has a significant effect on radio performance, which is one reason professional installation is valuable for ham radio systems specifically, since an improperly mounted antenna can meaningfully reduce the radio’s effective range.
Why Professional Overlanding Electronics Installation Matters
Overlanding builds often involve multiple systems working together, including power, lighting, and communication equipment, all of which need to function reliably in conditions where a repair shop is not nearby.
Professional installation accounts for how these systems interact, properly sizing wiring for the electrical load, protecting connections against vibration and moisture, and testing the complete system before you rely on it in the field. This is particularly important for overlanding vehicles, since a wiring issue that might be a minor inconvenience in daily driving can become a genuine problem hours from the nearest town. A build that has been properly planned and installed from the start tends to be far more dependable than one assembled piecemeal over time without an overall electrical plan. You can learn more about the technicians who handle this work on the Our Team page.
Choosing Overlanding Accessories Installation That Matches Your Build
Overlanding accessories installation works best when it is planned as a complete system rather than a series of unrelated purchases. A technician who understands how your power, lighting, and communication equipment need to work together can help avoid the mismatched wiring and undersized components that often show up in builds assembled piece by piece without an overall plan.
How to Plan a Complete Overlanding Vehicle Build
Planning a complete overlanding build starts with an honest assessment of how and where you actually travel, rather than trying to install every available accessory at once.
Consider your typical trip length and how far off-grid you usually travel, since this affects how much auxiliary power capacity you actually need. Think about whether you usually travel solo or in a group, which affects how much priority to place on communication equipment like a ham radio setup. Prioritize your build in phases if needed, starting with a solid auxiliary power foundation before adding lighting and communication systems, rather than spreading a limited budget across too many upgrades at once, and review available financing options if you are planning a larger build. A consultation with an experienced installer can help translate your specific travel plans into a build that actually matches how you use your vehicle, rather than a generic accessory package.
Frequently Asked Questions
What accessories should I add to an overlanding vehicle?
Most builds start with auxiliary power, off-road and auxiliary lighting, and some form of communication equipment, with the specific combination depending on your travel style and how far off-grid you typically go.
How much auxiliary power do I need for overlanding?
This depends on your trip length, how far off-grid you travel, and which accessories you plan to run. A consultation can help size a power system around your specific usage.
What is the best power setup for overlanding?
There is no single best setup for every traveler. The right combination of auxiliary battery, charging sources, and possibly a portable power station depends on your specific travel habits and budget.
Can you install off-road lighting?
Yes. Off-road lighting can be installed on the bumper, roof rack, or grille area, with proper wiring and switching to ensure it is used appropriately for trail conditions.
Can you install auxiliary lighting?
Yes. Auxiliary lighting for camp setup, awning areas, and low-speed technical terrain can be added and wired to a separate switch panel from your main driving lights.
Can you install a ham radio in an overlanding vehicle?
Yes. Ham radio installation includes mounting the radio unit and properly positioning an external antenna, which has a significant effect on the system’s overall performance.
Can a portable power station be integrated into a vehicle?
Yes. Portable power stations can be wired to recharge automatically from the vehicle’s electrical system while driving, combining flexibility with reliable charging.
What communication equipment is useful for overlanding?
Options range from handheld radios for group communication to more capable mobile radio systems and satellite-based devices for areas completely outside radio range, depending on where and how you travel.
How much does an overlanding electronics installation cost?
Cost varies significantly depending on the scope of the build, from a basic auxiliary power setup to a complete power, lighting, and communication package. A consultation can provide an accurate estimate based on your plans.
Should I have my overlanding electronics professionally installed?
For most builds, particularly those involving auxiliary power systems and communication equipment, professional installation helps ensure components are properly integrated and reliable when you are away from a repair shop.
Build Your Overlanding Vehicle for Your Next Adventure
A reliable overlanding setup depends on properly planned power systems, lighting upgrades, charging solutions, and communication equipment working together as one complete system. Audiomobile Hayward helps Bay Area drivers create customized vehicle builds designed around their travel style, equipment needs, and adventure goals.
Whether you are upgrading an existing setup or starting a new build, our team can help select and professionally install the right overlanding accessories installation solutions for your vehicle. Call Audiomobile Hayward at +1 510-839-1992 to schedule your overlanding consultation today.
Stay connected with Audiomobile Hayward for more vehicle upgrade ideas, overlanding builds, installation projects, and automotive technology updates. Follow our social media pages to see recent projects, discover new vehicle solutions, and stay updated on services available for drivers across Hayward and surrounding Bay Area communities.
Follow Audiomobile Hayward:
David Trinh